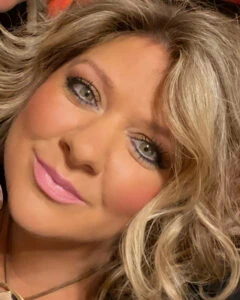
Your hair can make or break a photoshoot. Whether you’re preparing for branding portraits, a family session, or an editorial spread, the work you put in before the camera ever clicks determines how polished and natural you look in the final images. Florida’s humidity adds an extra layer of complexity to the equation, which means a solid prep routine isn’t optional: it’s essential. The good news? Most of the effort happens in the weeks leading up to your shoot, not the day of. A smart approach to photoshoot hair styling starts long before you sit in the makeup chair. Getting your color right, repairing damage, and building a plan with your stylist will save you from that sinking feeling when you see proofs that don’t match your vision. This guide walks through every phase of preparation, from the initial timeline down to post-shoot recovery, so your hair looks camera-ready from every angle. If you’re in Central Florida and want professional guidance, the award-winning team at The Look Salon & Spa in Oviedo can help you build a prep plan tailored to your shoot.
The Timeline for Professional Hair Prep
Timing is everything. The biggest mistake people make is waiting until the last minute to address color, cut, or damage. You need a minimum of two to four weeks of runway before your shoot date to handle any significant changes, and ideally six weeks if you’re doing something dramatic like going from dark to light or adding extensions. Think of it as a countdown: the further out you start, the more flexibility you have to course-correct if something doesn’t turn out as expected.
Scheduling Color and Cut Appointments
Book your color appointment at least two weeks before the shoot. This gives you time for the color to settle and soften, which photographs far better than freshly applied pigment. Hair color goes through a chemical oxidation process over 48 to 72 hours after application, and the tones continue to mellow for several days after that. A fresh balayage or highlight that looks slightly warm on day one will look perfect by day ten.
Your cut should happen about a week before the shoot. This gives the shape time to relax and fall naturally, rather than looking freshly trimmed. If you’re adding layers or bangs, that extra week lets you practice styling them at home so you’re not caught off guard on set.
Deep Conditioning and Repair Treatments
Damaged hair doesn’t photograph well. Split ends catch light in unflattering ways, and dry, porous strands tend to frizz under studio lighting or outdoor sun. Start a deep conditioning regimen three to four weeks out, using a protein-based treatment every seven to ten days. Look for masks containing keratin or hydrolyzed silk proteins, which temporarily fill in gaps along the hair shaft.
If your hair has significant damage from heat styling or chemical processing, consider a professional treatment like a keratin smoothing service. These treatments coat the hair cuticle and create a smoother surface that reflects light evenly: exactly what you want for photos. Your stylist can recommend the right intensity based on your hair’s current condition and texture.
Optimizing Hair Health and Texture Before the Shoot
The week before your photoshoot is about fine-tuning. Your color is settled, your cut has relaxed, and now it’s time to focus on texture and manageability. This is where the details matter most, because the camera picks up everything your mirror doesn’t.
Washing Strategies: The Night Before vs. Day Of
Here’s a reality check I share with clients regularly: squeaky-clean hair is actually harder to style. Freshly washed hair tends to be slippery, flat, and resistant to holding curl or volume. For most hair types, washing the night before the shoot gives your natural oils just enough time to return, providing grip and body.
If you have fine or oily hair, you might still prefer a morning wash, but skip the heavy conditioner. Apply conditioner only from mid-shaft to ends, and use a lightweight volumizing product at the roots. For thicker or coarser textures, washing two nights before can work even better, especially if you’re planning an updo or textured style. A light dusting of dry shampoo at the roots on shoot morning adds volume without weighing things down.
Managing Frizz and Flyaways for the Camera
Florida’s humidity is a constant challenge. Even with perfect prep, stepping outside for an outdoor shoot can undo your work in minutes. The key is layering your anti-frizz strategy. Start with a smoothing serum or lightweight oil on damp hair the night before, then use a humidity-resistant finishing spray on the morning of the shoot.
Avoid heavy silicone-based products that can create a greasy sheen under flash photography. Instead, opt for water-based serums that control frizz without adding visible residue. Keep a small anti-humidity spray in your bag for touch-ups between setups: this single step can save you hours of retouching later.
Coordinating with Your Stylist and Photographer
Communication between you, your hair stylist, and your photographer is one of the most overlooked steps in shoot prep. Each person brings a different perspective, and aligning those perspectives early prevents last-minute surprises.
Sharing Mood Boards and Reference Images
Put together a mood board with five to ten reference images that capture the vibe you’re going for. Pinterest and Instagram work great for this. Include a mix of hair-specific shots and full-look images so your stylist understands the overall aesthetic, not just the hairstyle in isolation. A sleek, editorial blowout reads very differently paired with soft natural makeup versus bold, dramatic glam.
Share these references with both your stylist and photographer at least a week before the shoot. Your photographer can flag potential issues: certain hairstyles might not work with the planned lighting setup, or a particular look might clash with the wardrobe. Your stylist can assess whether the reference styles are realistic for your hair type and length, and suggest alternatives if needed.
Understanding Professional Styling Price Ranges
Budgeting for professional styling on set is worth understanding upfront. Freelance session stylists working on commercial photoshoots in major markets typically command day rates ranging from $500 to $2,000 or more, depending on experience and the scope of the project. For personal branding shoots or portrait sessions, you’ll often find more accessible options.
Many salon-based stylists offer photoshoot styling packages that include a trial run and day-of styling for a fraction of those rates. Pricing varies based on your location, the complexity of the style, and whether you need multiple looks during the session. The best approach is to consult directly with your stylist about pricing before booking. If you’re in the Oviedo or greater Orlando area, The Look Salon & Spa offers consultations where you can discuss your shoot goals and get transparent pricing tailored to your needs.
Essential Day-of Styling Kit for the Set
Even if you have a professional stylist on set, having your own emergency kit is smart. Things shift during a shoot: wind picks up, you change outfits, someone accidentally brushes against your hair during a wardrobe swap. A compact kit keeps you covered between setups.
Here’s what to pack:
- Travel-size dry shampoo for root volume and oil absorption
- Bobby pins and clear elastics that match your hair color
- A small can of flexible-hold hairspray (avoid extra-hold, which can create a stiff, unnatural look on camera)
- Anti-frizz sheets or a mini humidity spray
- A fine-tooth comb and a boar bristle brush
- Hair clips for sectioning between looks
- A small mirror for quick checks
If you’re doing multiple hairstyle changes during the shoot, bring a compact flat iron or curling wand. Cordless options have improved significantly and are perfect for on-location shoots where outlets aren’t guaranteed. Keep everything in a zippered pouch so you’re not digging through a bag while the photographer waits.
Post-Shoot Care and Recovery
Photoshoots are hard on hair. Between the extra product, heat styling, and potentially hours of being pinned, teased, or sprayed, your strands need some recovery time afterward. Don’t just crash on the couch and deal with it tomorrow: a little post-shoot care goes a long way.
Start by gently removing all pins and accessories before washing. Yanking out bobby pins from teased hair is a fast track to breakage. Use a wide-tooth comb or detangling brush to work through any backcombing, starting from the ends and working up. Apply a leave-in conditioner or detangling spray to help the process.
Wash with a clarifying shampoo to remove product buildup, then follow with a deep conditioning mask. Leave the mask on for at least ten minutes: longer if your hair was subjected to heavy heat styling. Skip the blow dryer and let your hair air-dry if possible. Give your hair a full 48 to 72 hours off from heat tools to let the cuticle recover. If your hair feels particularly stressed, a professional conditioning treatment at the salon within a week of the shoot can restore moisture and elasticity.
Frequently Asked Questions About Photoshoot Hair
Should I try a new hairstyle for my photoshoot?
Stick with styles you know work for you, with minor upgrades. A photoshoot is not the time to experiment with a drastically different look. If you want to try something new, do a trial run with your stylist at least a week before so you can see how it photographs and make adjustments.
Can I style my own hair for a professional photoshoot?
You can, but hiring a professional makes a noticeable difference in the final images. A stylist trained in photoshoot hair styling understands how different techniques translate on camera, including how light interacts with texture, volume placement, and which products photograph well versus which ones create unwanted shine or residue.
How many hairstyles should I plan for one session?
For a two-hour shoot, plan for one to two looks. For a half-day or full-day session, you can realistically fit three to four styles with enough time for changes. Each style change typically takes 15 to 30 minutes, so factor that into your schedule.
What if my hair doesn’t cooperate on shoot day?
This is exactly why the prep timeline matters. If you’ve followed the washing strategy, used the right products, and done a trial run, the odds of a bad hair day drop significantly. But if something does go sideways, a skilled stylist can pivot quickly. Having reference images for a backup style gives everyone a plan B.
Does hair color affect how I photograph?
Absolutely. Certain tones photograph warmer or cooler than they appear in person, depending on lighting. Cool-toned lighting can make warm highlights look flat, while warm lighting can make ash tones appear muddy. Discuss your shoot’s lighting setup with both your colorist and photographer so your color works in the final images.
Final Verdict
Great photos start with great preparation, and your hair deserves the same attention as your wardrobe, makeup, and location. The weeks leading up to a shoot are where the real work happens: scheduling your color and cut with enough lead time, repairing damage, coordinating with your creative team, and building a day-of kit that keeps you covered. Styling for the camera is its own skill set, and investing in professional guidance pays off in images you’ll actually love.
If you’re in Central Florida and have a shoot coming up, the team at The Look Salon & Spa in Oviedo specializes in helping clients look their absolute best for the camera. From color consultations to day-of styling, their award-winning stylists can build a prep plan around your specific shoot goals. Request an Appointment to get started, and walk into your next session with total confidence.